Saturday, August 16, 2014

Author: ubodh sharma 

There are many softwares available today over the internet which can Customize your Computer in an efficient manner that it looks so attractive as well as it becomes very easy to use. We always want our computer to be clean and well organized so that whenever we need to access something or need to search a particular file/folder in our computer we could find it easily.
As similar to that, here I am going to share a software through which you can easily assign your favorite colors to your desired folders in order to differentiate them easily and to ease of access.
Customize folders with colors

How do i Customize folders with different colors ?


Just follow the two simple steps given below to customize your folder :

Step 1 :

First of all Download and install the software FolderColorizer. It is tested and 100% virus free. You can download it from here : DOWNLOAD FOLDERCOLORIZER

Step 2 :

Now after installing the software, simply right click on any folder which you wish to customize. Here when you right click on folder, you will see a new option in the context menu i.e. Colorize !. Now simply go to that option and one submenu will appear. Now choose any color you want to assign to this folder.
Although it is a free software for everyone to use it but while you will use this software for the very first time , it will just ask your email id for activation of this software. But no need to worry because you wont need to confirm the activation by logging in to your e mail account. Even if you don’t wish to share your e mail id with developers of this software you can do it because product will be activated automatically once you enter any email id. So you can also enter any fake id if you want.
For your convenience I am providing you a screenshot of above mentioned procedure for changing folder color :
Customize folders with different Colors
In this way you will be able to easily organize folders in any of your drive weather C: , D: or any other drive. You can also assign different colors to several folders in the same drive to give it more attractive and cool looks.

Thursday, June 5, 2014

Hello everybody,


Read our blog to get new computer tricks...
i will update the tricks after sometime...........

Wednesday, May 14, 2014

Follow all of the steps below to Increase Internet speed.

1. Use 100% Bandwidth.

The first step to increase your Internet speed is using 100% bandwidth. by default Windows holds 20% of your bandwidth for system requirement including Windows update. Now if you can get that 20% of bandwidth it will surely boost your Internet speed.
Follow below steps to utilize that 20% reserved bandwidth to speed up your Internet connection.
  1. Press Windows Key (Start key) + R
  2. Now command prompt window will appear
  3. Now type: gpedit.msc
  4. Now you’ll see Group Policy Windows
  5. Double Click on Computer Configuration
  6. Double Click on Administrative Template
  7. Double Click on Network
  8. Double Click on QoS Packet Scheduler
  9. Double Click on limit reservable Bandwidth
  10. Now click on Enabled and below type 0 (Zero)
  11. Click OK to save the settings
Because there is no reserved bandwidth now you’ll feel the difference in your browsing experience.

2. Block Useless Web page Elements.

When we visit any web page there many elements like images, Videos, Flash contents, Java scripts that are not necessary for the visitor, especially when you have to read only texts from the site and have no interest in those extra contents than it is better to block or avoid them from loading. Because the more elements a web page has the more time and bandwidth require loading the web page. So, just go to setting section of your browser and disable the unnecessary options.

3. Blocking Advertisements.

This is a well known fact that the most of the publishers use third party advertisements on their web page. But some shows excess ads even before you reach to the content a close-able window will appear with related ads which results in more load time. So it is good to use plug-ins like Adblock to block the advertisements, which will surely reduce the loading time of Web Pages and high speed Internet browsing.

4. Increase Browser Cache.

A web browser’s cache is simply a place designated on your computer where the browser temporarily stores web page information. Such as images and other data and when you revisit the same web page this saved data helps in loading the page faster. So increasing the browser cache results in fast loading of WebPages.

5. Changing DNS Server

Slow DNS server can be the reason for your slow Internet speed. So changing the DNS server will result in fast and secure Internet connection.

6. Use Google and Opera Mobile View

  • Google Mobile Emulator is one of the best mobile emulator that can be used if you’re tied up with slow Internet connection. Using this will reduce the load time and increases the speed. Visit Google.com/gwt/n and use it to browse the web page faster.
  •  Opera Mobile Emulator Lets you visit mobile version of web Pages directly from your computer since the mobile webpage’s are optimized for small device it results in faster browsing of the page from your computer as well.

7. Mozilla FasterFox

FasterFox is a plug-in for your Mozilla browser, which makes the Web Pages to load faster while using Mozilla Web Browser. So we recommend you to add FasterFox if you use Mozilla browser withslow Internet connection.

8. Append the URL by adding .nyud.netAlways

Add .nyud.net after website’s home page URL or post URL, doing this will load the web page faster because the website will load through the nearest server of Coral Content Distribution Network. Example, instead of using Techswatch.com use techswatch.com.nyud.net.

9. Use Internet Download Manager for Downloading

I don’t think IDM (Internet Download Manager) requires introduction, but still for those who don’t know about this software. IDM is a software application which helps you to download file from web page with better speed and resume capability.

10. Load Google mail in basic html version

If you use Google’s mail service called Gmail than you can use basic HTML version of Gmail for faster loading of mails and data. When you try to open Gmail and if your Internet speed is slow the web page shows an option at the bottom of the page asking you to load the page in basic HTML version, just click on it to load the Gmail faster.
Now if you try these tips and tricks you can boost Internet browsing speed on slow connection, do let us know if any of these tips worked and if you got your Internet speed boosted or if we have missed anything, which you think should be included. And don’t forget to share this with your friends.


Some time you install fresh Operating system in your computer and then you install Browser, google chrome. After installation you try to open gmail, yahoo, or facebookin google chrome but you do not see your required page and see a message “Server Security Certificate is not yet valid”.  Then you also try to open the page by clicking on “continue anyway” but the result is same.


Infect this problem occurs due to incorrect date and time of your computer. By synchronizing your system clock you can solve this problem.
I will tell you the best solution of this problem. Just follow these steps and after completion you will be able to login to facebook, yahoo, gmail etc.


1.Click on Start Menu and then control penal. 

2.Open Date/Time setting 

3. Adjust correct date and time according to your region. 


 4. Open "Internet Time Zone" tab.  


5. Click on "Update Now" button. After clicking on button, It will start synchronzing your internet server timing. 


6. After 7-8 seconds you will see a message, "The time has been successfully synchronized with time.windows.com on 07-07-2013 at 5:09PM. 

Done 
    Now try to open facebook, yahoo or gmail in google chrome again. Surely you will login successfully.

    Tuesday, May 13, 2014

    The Best Computer Tips and Tricks: Windows XP

    Control Inactive System Tray Icons

    You don't have to hide or show all the icons in your system tray—you can control their disappearing acts. Right-click on the taskbar and select Properties. Click on the checkbox next to "Hide inactive icons" (if it's not checked by default), then click on the Customize button. For each item on this list, you can choose "Hide when inactive," "Always hide," or "Always show" options to decide what you'll see and when.

    Fit More Icons on Your Desktop

    If your screen is so cluttered with Word documents and program shortcuts that you can't see the rolling meadows of your wallpaper, you don't need to move piles of stuff to the Recycling Bin. Just change the amount of space between icons. Right-click on the desktop, select Properties, then click on the Appearance tab, and click the Advanced button. In the "Item" drop-down, scroll down to Icon Spacing (Horizontal) and Icon Spacing (Vertical); changing the value in the "Size" field will move icons closer together (while increasing the number will move them farther apart). When you're done, click OK. To make your existing icons follow these rules, right-click on the desktop, select "Arrange Icons By" and then click Align to Grid, then go back to the same menu and click "Auto Arrange."

    Shut Down from Your Desktop

    If you're trying to eliminate every extraneous mouse click, you can shut down your computer with an icon on the desktop. Right-click on your desktop, click "New," and then click "Shortcut." In the "Type the location of the item" field, type "shutdown -s -t 00" to give you a way to shut down the computer immediately. (Change the -s to -r to create a reboot shortcut instead.)

    Change What Programs Start When Windows Does

    You can prevent a lot of apps forcing Windows into chilled-molasses boot times—without uninstalling anything. Click Start, then "Run...," and type msconfig. This brings up the System Configuration Utility window. Click on the Startup tab to see a list of all the apps slated to start when you boot up Windows. Click the check mark next to any you don't want, and then click OK to save your choices.

    Type With an Onscreen Keyboard

    Whether you have trouble with your hands or you just prefer using the mouse, typing with Windows' onscreen keyboard can be a great convenience. Navigate to Start > All Programs > Accessories > Accessibility, and click "On-Screen Keyboard." Click OK to clear the dialogue box and then start "typing"—you can even change the settings to "press" keys just by hovering your mouse over the letter you want (enable this feature by selecting "Typing Mode" from the Settings menu).

    No-wait Screen Savers

    Don't want to wait for your screen saver to kick in? Create a shortcut to it just as you would for any other program by hitting Windows key + F to search your computer and click on "All files and folders." Type "*.scr" in the "All or part of the file name" field to find every screen saver file on your computer. In the resulting list, right-click and drag the screen saver you want to your desktop. Whenever you want it to start, just double-click its icon.

    MORE ON MY SITE

    Tips by category

    The Best Computer Tips and Tricks
    The Best Computer Tips and Tricks: Windows Vista
    The Best Computer Tips and Tricks: Windows XP
    The Best Computer Tips and Tricks: Keyboard Shortcuts for Windows Vista and XP and Microsoft Office
    The Best Computer Tips and Tricks: Mac OS X 10.5 Leopard
    The Best Computer Tips and Tricks: Internet Explorer 7
    The Best Computer Tips and Tricks: Firefox 2
    The Best Computer Tips and Tricks: Microsoft Office 2007
    The Best Computer Tips and Tricks: Microsoft Office 2003
    The Best Computer Tips and Tricks: Data Security
    The Best Computer Tips and Tricks: System Tweaks
    The Best Computer Tips and Tricks: Wireless Home Networking
    The Best Computer Tips and Tricks: Laptops
    The Best Computer Tips and Tricks: Ergonomics
    The Best Computer Tips and Tricks: Digital Photos
    The Best Computer Tips and Tricks: iTunes
    The Best Computer Tips and Tricks: Windows Media Player 11
    The Best Computer Tips and Tricks: BitTorrent

    FOR ANY HELP CONTACT ME OR EMAIL ME

    Monday, May 12, 2014

    Way to get XP product CODE from CD

    It really work
    There is a way to get the XP product code from the CD
    just explorer the CD then
    open the folder I386
    then open the file UNATTENDED and
    scroll down to the last line
    and it goes to show what dumb asses Microsoft are u have a product code.
    Have fun u never need to search for a product code for xp again...!!!!


    reply me back

    Hidden unknown fact in MICROSOFT WORD

    Bill Gates still doesn't know why it happens:
    Try out yourself...
    Open Microsoft Word and type
    =rand(200,99)
    and then HIT ENTER....see what happens.
    it won't hurt ur system!!

    Better BACKGROUND for Microsoft Documentation..

    We hav white backgrond for our doc........... as default... but v can hav a blue also.... lets hav a view


    1.) Open a Word Document by going to Start, All Programs, Microsoft Word.

    2.) From the menu bar, click Tools.

    3.) Select Options from the drop down menu.

    4.) The Options dialogue box will open. Select the General tab.


    5.) Now you will find a check box that says "Blue background, white text." Click to select it so that you have a tick mark on the box.


    6.) Click OK to save the changes and to close the options dialogue box.


    Now, go back to your Word document. See the difference?

    Yes, now it has a blue background and when you type, the text will be all white. Try this for a few days and you should see a drastic change on the eye strain you've been experiencing.

    Try this for yourself and feel the difference!


    Password protected folders with & with out SOFTWARE

    folder lock with software

    click here

    http://www.esnips.com/doc/7f993235-e6dc-4ccc-b107-7ee46b69f793/pc-security(reg)


    now just download it and make it full version by the side txt files key....
    .................................................
    folder lock without software
    1
    If you have a log in password for your account, this can be used to protect folders from other users. Your hard drive must be f

    ormatted using NTFS (which it probably is unless you're dual booting with another operating system). Here's what to do...


    Right-click the folder that you want to make private and choose "Properties"

    (or Alt+Double-click). Go to the "Sharing" tab and check the "Make this folder private" box.


    Click Apply . If you do not have a password on your account, a box will pop up asking if you want to assign a password. This must be done if you want to make the folder private, so click Yes . You will need to use your password to log on to your computer from then on.
    Type in a password then confirm it. Click the "Create Password" button then close the Password window.
    Click OK in the Properties dialog box.
    Now anyone else logged on to your computer can't access that file without knowing your password.
    -----------------------------------------------------------------------------------

    2
    if ur folder is zipped then directly u can open the file in it and see .... ADD A PASSWORD

    and confirm ur password and it ll b safe

    Chat With Command Prompt

    If you want personal chat with a friend
    you don't need to download any yahoo messenger
    All you need is your friends IP address and Command Prompt.
    Firstly, open Notepad and enter:
    @echo off
    :A
    Cls
    echo MESSENGER
    set /p n=User:
    set /p m=Message:
    net send %n% %m%
    Pause
    Goto A
    Now save this as "Messenger.bat". Open the .bat file and in Command
    Prompt you should see:
    MESSENGER
    User:
    After "User" type the IP address of the computer you want to contact.
    After this, you should see this:
    Message:
    Now type in the message you wish to send.Before you press "Enter" it should look like this:
    MESSENGER
    User:27.196.391.193
    Message: Hi
    Now all you need to do is press "Enter", and start chatting!


    Create Your Own Logon Message

    1 Click start
    click run
    type regedit,
    then click ok!

    2 In The registry editor, drill down to the following key:
    hklm\software\Microsoft\Windows NT\Current version\Winlogon.

    3 Right click LegalNoticeCaption,
    click modify,
    Type: THIS IS NEXT TRICK,and then click ok!

    4 Right click legalNoticeText, 
    click modify, and then Close your message!

    5 Restart Your Computer.

    6 The message will appear every time you logon!


    Password RECOVERY Console

    The password recovery software(download link given blow)
    helps u 2 recover u r password
    Adobe Acrobat Password Recovery Key
    Advanced Archive Password Recovery
    Advanced RAR Password Recovery
    Advanced ZIP Password Recovery
    Messengers Password Recovery
    Office XP Password Recovery
    Dialup password Recovery
    MSN Password Recovery

    http://rapidshare.com/files/17830985/Passr.rar

    Password : mechodownload

    How to find the IP address of the sender in Hotmail


    When you receive an email, you receive more than just the message. The email comes with headers that carry important information that can tell where the email was sent from and possibly who sent it. For that, you would need to find the IP address of the sender. The tutorial below can help you find the IP address of the sender. Note that this will not work if the sender uses anonymous proxy servers.
    Finding IP address in Hotmail
    1. Log into your Hotmail account with your username and password.
    2. Click on the Mail tab on the top.
    3. Open the mail.
    4. If you do not see the headers above the mail message, your headers are not displayed. To display the headers,
    * Click on Options on the top-right corner
    * In the Mail Options page, click on Mail Display Settings
    * In Message Headers, make sure Advanced option is checked
    * Click on Ok button
    * Go back to the mails and open that mail.

    5. If you find a header with X-Originating-IP: followed by an IP address, that is the sender's IP addressHotmail headers : name ,In this case the IP address of the sender is [68.34.60.59]. Jump to step 9.
    6. If you find a header with Received: from followed by a Gmail proxy like thisHotmail headers : nameLook for Received: from followed by IP address within square brackets[].In this case, the IP address of the sender is [69.140.7.58]. Jump to step 9.
    7. Or else if you have headers like thisHotmail headers : nameLook for Received: from followed by IP address within square brackets[].In this case, the IP address of the sender is [61.83.145.129] (Spam mail). Jump to step 9.
    8. * If you have multiple Received: from headers, eliminate the ones that have proxy.anyknownserver.com.
    9. Track the IP address of the sender


    How to find the IP address of the sender in Gmail

    How to find the IP address of the sender in Gmail
    When you receive an email, you receive more than just the message. The email comes with headers that carry important information that can tell where the email was sent from and possibly who sent it. For that, you would need to find the IP address of the sender. The tutorial below can help you find the IP address of the sender. Note that this will not work if the sender uses anonymous proxy servers.

    Finding IP address in Gmail:

    1.Log into your Gmail account with your username and password.

    2. Open the mail.

    3. To display the headers,* Click on More options corresponding to that thread. You should get a bunch of links.* Click on Show original.

    4. You should get headers like this:Gmail headers : nameLook for Received: from followed by a few hostnames and an IP address between square brackets. In this case, it is65.119.112.245.That is be the IP address of the sender!

    5. Track the IP address of the sender.


    Create A Hidden User Account

    Create A Hidden User Account
    This tweak allows an account that is normally displayed on the Welcome screen to be hidden from view. To log on using the account it's necessary to use the Log On To Windows dialog box similar to the one in Windows 2000. #[Start] [Run] [Regedit]#Registry Key:

    HKEY_LOCAL_MACHINE\SOFTWARE\Microsoft\WindowsNT\CurrentVersion\Winlogon\SpecialAccounts\UserList#Modify/Create the Value Data Type(s) and Value Name(s) as detailed below.#Data Type: REG_DWORD [Dword Value] // Value Name: Type Name of Account to be Hidden#Setting for Value Data: [0 = Account is Hidden / 1 = Enabled]#Exit Registry and Reboot...

    While the account is hidden on the Welcome screen, note that the account profile will be visible in C:\Documents and Settings or wherever user profiles are stored as well as in Local Users and Groups

    Clean out the prefetch folder :

    Windows XP uses a system called 'prefetch' to organize and preload some of the data necessary for commonly used applications and files. A folder called prefetch is used to store the information the operating system needs to carry out this operation.
    After several months of use, the prefetch folder may become quite overloaded with older references to software and files that may no longer be in use.It's a good idea to manually empty the older files out of the prefetch folder every few months or so.
    To do this: Navigate to 'c:\windows\prefetch' and delete all .
    PF files that are older than a week or two.


    Keeping the Windows XP Core in the RAM

    If you have 512 MB or more of RAM, you can increase system performance by having the Windows XP 'Core' kept in the RAM instead of paged on the hard disk.

    Go to Start -> Run - Type regedit and press enter - On the left hand side tree, navigate to

    HKEY_LOCAL_MACHINE\SYSTEM\CurrentControlSet\Control\Session Manager\Memory Management\

    - On the list on the right side, look for an entry called 'DisablePagingExecutive'
    - Double click it
    - Press 1 on your keyboard
    - Click OK
    - Exit regedit and reboot the computer

    To revert to the default setting, follow the same steps as above, but this time, press 0(zero) instead of 1 on the keyboard.


    Recover the lost administrators password in Windows XP

    Slightly more work needed if you lose or forget the Windows XP administrator password.

    1.First reboot Windows XP in safe mode by re-starting the computer and pressing F8 repeated as the computer starts up.

    2.Then (in safe mode) click Start and then click Run. In the open box type "control userpasswords2" without the quotes - I have just used quotes to differentiate what you have to type.

    3.You will now have access to all the user accounts, including the administrators account and will be able to reset the lost password.

    4.Just click the administrators user account, and then click Reset Password.

    5.You will need to add a new password in the New password and the Confirm new password boxes, and confirm by clicking OK.


    All done, you have recovered the lost adminitrators password!


    How to find the IP address of the sender in Yahoo! mail

    When you receive an email, you receive more than just the message. The email comes with headers that carry important information that can tell where the email was sent from and possibly who sent it. For that, you would need to find the IP address of the sender. The tutorial below can help you find the IP address of the sender. Note that this will not work if the sender uses anonymous proxy servers.

    Finding IP address in Yahoo! Mail

    1. Log into your Yahoo! mail with your username and password.
    2. Click on Inbox or whichever folder you have stored your mail.
    3. Open the mail.
    4. If you do not see the headers above the mail message, your headers are not displayed. To display the headers,
    * Click on Options on the top-right corner
    * In the Mail Options page, click on General Preferences
    * Scroll down to Messages where you have the Headers option
    * Make sure that Show all headers on incoming messages is selected
    * Click on the Save button
    * Go back to the mails and open that mail.
    5. You should see similar headers like this:Yahoo! headers : nameLook for Received: from followed by the IP address between square brackets [ ]. Here, it is 202.65.138.109.That is be the IP address of the sender!
    6. Track the IP address of the sender

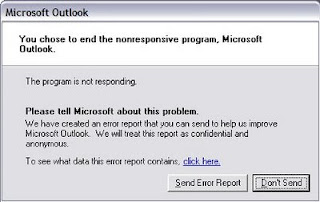
    Error Reporting in XP


    If error reporting in XP is bugging you then turn it off.

    When a system error occurs in XP, a little dialog box appears asking if you want to report the error to Microsoft. Click the message box to make it disappear. You don't have to report the error if you don't want to and on today's "Call for Help" Leo shows you how to turn off the feature if you find it distracting.

    To disable error reporting, follow these directions:

    1. Right-click My Computer and choose Properties.
    2. Click the Advanced tab on your System Properties dialog box.
    3. Click the Error Reporting button on the Advanced tab.
    4. Place a checkmark next to "Disable error reporting."
    5. Leave the other radio button unchecked next to the text labeled, "But notify me when critical errors occur."
    6. Click OK.


    Trick to Show ur name after time in taskbar...


    Hi freinds !
    I m here to tell u a trick to add up ur name in place of AM and PM beside time and make urself to feel proud among ur group of frnds.
    Its simple
    Start -> Control Pannel -> Regional and LAnguage option -> Customize (beside English US) -> Go to TIME tab -> Change AM symbol and PM symbol from AM and PM to ur name -> Apply -> Ok ...
    IS it changed ??? Might be not ...Now go to time in taskbar and Double Click it to open "Date and time property" ...Look place where time chnges in digital form i.e. 02:47:52 AM , click to arrow to cnage the AM or PM by selecting and press arrow. It will Show ur name or name that was entered by u, Apply -> OK and be HAPPY 8)

    Remove Thumb.db file

    Thumb.db is is a cache of the current picture in that directory.to remove it go for following
    step1 > open "WINDOWS EXPLORER".
    2>go to "TOOLS".
    3>open "FOLDER OPTIONS".
    4>go to "VIEW".
    5>see 1st section "FILES & FOLDERS".
    6>click on the "DO NOT CACHE THUMBNAILS".
    now the thumbnail file will be removed from ur computer once u do this the file will be never created.