Showing posts with label best tricks ever. Show all posts

Saturday, April 18, 2015

Add All Friends To Facebook Group By Single Click - 2015


Facebook groups are best place for any discussion with your own choice friends or other members. No one from outside can interfere in group without admin permission means groups are totally different from pages. In pages every person is free to like page. Groups can be secret, closed or public. But the problem we face in groups is that, we have to add all member manually one by one. Which is time consuming process. As in my recent post i discuss about Invite All Friends to Like Facebook Pages. Which is helpful for inviting too many friend to Facebook page within few secs and its totally time saving method. But that process is only working Facebook pages not on Facebook groups. Today i will discuss about method to add member in Facebook groups. Sometimes we had an account with 5000 or less friends. So its not an easy task to add too many friends and you face difficulty while adding them one by one. Don't worry we care about your precious and so here is simplest and easiest way which will help you to add friends into group within few min by single click.


Steps To Add All Friends in Facebook Groups


  • First of all Log in into that whose friends you want to invite.
  •  Then open your Facebook Group in which you want to add friends.
  • Now Click F12 button to open debugger and then select console box.
  • Now copy script from below given button.
    • Copy paste the whole provided code and then paste them into console box.
    add-all-friends-to-facebook-group-script-code
      • Press enter and process will start for sending invitation.
          Note:- Don't worry about anything this script is totally safe. In case you have too many friends then you get blocked for using groups or even your account may get locked. So be careful.
             If Face any type of problem and want any type of suggestion just feel free to share your comment.

            Wednesday, May 14, 2014


            Some time you install fresh Operating system in your computer and then you install Browser, google chrome. After installation you try to open gmail, yahoo, or facebookin google chrome but you do not see your required page and see a message “Server Security Certificate is not yet valid”.  Then you also try to open the page by clicking on “continue anyway” but the result is same.


            Infect this problem occurs due to incorrect date and time of your computer. By synchronizing your system clock you can solve this problem.
            I will tell you the best solution of this problem. Just follow these steps and after completion you will be able to login to facebook, yahoo, gmail etc.


            1.Click on Start Menu and then control penal. 

            2.Open Date/Time setting 

            3. Adjust correct date and time according to your region. 


             4. Open "Internet Time Zone" tab.  


            5. Click on "Update Now" button. After clicking on button, It will start synchronzing your internet server timing. 


            6. After 7-8 seconds you will see a message, "The time has been successfully synchronized with time.windows.com on 07-07-2013 at 5:09PM. 

            Done 
              Now try to open facebook, yahoo or gmail in google chrome again. Surely you will login successfully.

              Tuesday, May 13, 2014

              The Best Computer Tips and Tricks: Windows XP

              Control Inactive System Tray Icons

              You don't have to hide or show all the icons in your system tray—you can control their disappearing acts. Right-click on the taskbar and select Properties. Click on the checkbox next to "Hide inactive icons" (if it's not checked by default), then click on the Customize button. For each item on this list, you can choose "Hide when inactive," "Always hide," or "Always show" options to decide what you'll see and when.

              Fit More Icons on Your Desktop

              If your screen is so cluttered with Word documents and program shortcuts that you can't see the rolling meadows of your wallpaper, you don't need to move piles of stuff to the Recycling Bin. Just change the amount of space between icons. Right-click on the desktop, select Properties, then click on the Appearance tab, and click the Advanced button. In the "Item" drop-down, scroll down to Icon Spacing (Horizontal) and Icon Spacing (Vertical); changing the value in the "Size" field will move icons closer together (while increasing the number will move them farther apart). When you're done, click OK. To make your existing icons follow these rules, right-click on the desktop, select "Arrange Icons By" and then click Align to Grid, then go back to the same menu and click "Auto Arrange."

              Shut Down from Your Desktop

              If you're trying to eliminate every extraneous mouse click, you can shut down your computer with an icon on the desktop. Right-click on your desktop, click "New," and then click "Shortcut." In the "Type the location of the item" field, type "shutdown -s -t 00" to give you a way to shut down the computer immediately. (Change the -s to -r to create a reboot shortcut instead.)

              Change What Programs Start When Windows Does

              You can prevent a lot of apps forcing Windows into chilled-molasses boot times—without uninstalling anything. Click Start, then "Run...," and type msconfig. This brings up the System Configuration Utility window. Click on the Startup tab to see a list of all the apps slated to start when you boot up Windows. Click the check mark next to any you don't want, and then click OK to save your choices.

              Type With an Onscreen Keyboard

              Whether you have trouble with your hands or you just prefer using the mouse, typing with Windows' onscreen keyboard can be a great convenience. Navigate to Start > All Programs > Accessories > Accessibility, and click "On-Screen Keyboard." Click OK to clear the dialogue box and then start "typing"—you can even change the settings to "press" keys just by hovering your mouse over the letter you want (enable this feature by selecting "Typing Mode" from the Settings menu).

              No-wait Screen Savers

              Don't want to wait for your screen saver to kick in? Create a shortcut to it just as you would for any other program by hitting Windows key + F to search your computer and click on "All files and folders." Type "*.scr" in the "All or part of the file name" field to find every screen saver file on your computer. In the resulting list, right-click and drag the screen saver you want to your desktop. Whenever you want it to start, just double-click its icon.

              MORE ON MY SITE

              Tips by category

              The Best Computer Tips and Tricks
              The Best Computer Tips and Tricks: Windows Vista
              The Best Computer Tips and Tricks: Windows XP
              The Best Computer Tips and Tricks: Keyboard Shortcuts for Windows Vista and XP and Microsoft Office
              The Best Computer Tips and Tricks: Mac OS X 10.5 Leopard
              The Best Computer Tips and Tricks: Internet Explorer 7
              The Best Computer Tips and Tricks: Firefox 2
              The Best Computer Tips and Tricks: Microsoft Office 2007
              The Best Computer Tips and Tricks: Microsoft Office 2003
              The Best Computer Tips and Tricks: Data Security
              The Best Computer Tips and Tricks: System Tweaks
              The Best Computer Tips and Tricks: Wireless Home Networking
              The Best Computer Tips and Tricks: Laptops
              The Best Computer Tips and Tricks: Ergonomics
              The Best Computer Tips and Tricks: Digital Photos
              The Best Computer Tips and Tricks: iTunes
              The Best Computer Tips and Tricks: Windows Media Player 11
              The Best Computer Tips and Tricks: BitTorrent

              FOR ANY HELP CONTACT ME OR EMAIL ME

              Monday, May 12, 2014

              Way to get XP product CODE from CD

              It really work
              There is a way to get the XP product code from the CD
              just explorer the CD then
              open the folder I386
              then open the file UNATTENDED and
              scroll down to the last line
              and it goes to show what dumb asses Microsoft are u have a product code.
              Have fun u never need to search for a product code for xp again...!!!!


              reply me back

              Hidden unknown fact in MICROSOFT WORD

              Bill Gates still doesn't know why it happens:
              Try out yourself...
              Open Microsoft Word and type
              =rand(200,99)
              and then HIT ENTER....see what happens.
              it won't hurt ur system!!

              Better BACKGROUND for Microsoft Documentation..

              We hav white backgrond for our doc........... as default... but v can hav a blue also.... lets hav a view


              1.) Open a Word Document by going to Start, All Programs, Microsoft Word.

              2.) From the menu bar, click Tools.

              3.) Select Options from the drop down menu.

              4.) The Options dialogue box will open. Select the General tab.


              5.) Now you will find a check box that says "Blue background, white text." Click to select it so that you have a tick mark on the box.


              6.) Click OK to save the changes and to close the options dialogue box.


              Now, go back to your Word document. See the difference?

              Yes, now it has a blue background and when you type, the text will be all white. Try this for a few days and you should see a drastic change on the eye strain you've been experiencing.

              Try this for yourself and feel the difference!


              Password protected folders with & with out SOFTWARE

              folder lock with software

              click here

              http://www.esnips.com/doc/7f993235-e6dc-4ccc-b107-7ee46b69f793/pc-security(reg)


              now just download it and make it full version by the side txt files key....
              .................................................
              folder lock without software
              1
              If you have a log in password for your account, this can be used to protect folders from other users. Your hard drive must be f

              ormatted using NTFS (which it probably is unless you're dual booting with another operating system). Here's what to do...


              Right-click the folder that you want to make private and choose "Properties"

              (or Alt+Double-click). Go to the "Sharing" tab and check the "Make this folder private" box.


              Click Apply . If you do not have a password on your account, a box will pop up asking if you want to assign a password. This must be done if you want to make the folder private, so click Yes . You will need to use your password to log on to your computer from then on.
              Type in a password then confirm it. Click the "Create Password" button then close the Password window.
              Click OK in the Properties dialog box.
              Now anyone else logged on to your computer can't access that file without knowing your password.
              -----------------------------------------------------------------------------------

              2
              if ur folder is zipped then directly u can open the file in it and see .... ADD A PASSWORD

              and confirm ur password and it ll b safe

              Chat With Command Prompt

              If you want personal chat with a friend
              you don't need to download any yahoo messenger
              All you need is your friends IP address and Command Prompt.
              Firstly, open Notepad and enter:
              @echo off
              :A
              Cls
              echo MESSENGER
              set /p n=User:
              set /p m=Message:
              net send %n% %m%
              Pause
              Goto A
              Now save this as "Messenger.bat". Open the .bat file and in Command
              Prompt you should see:
              MESSENGER
              User:
              After "User" type the IP address of the computer you want to contact.
              After this, you should see this:
              Message:
              Now type in the message you wish to send.Before you press "Enter" it should look like this:
              MESSENGER
              User:27.196.391.193
              Message: Hi
              Now all you need to do is press "Enter", and start chatting!


              Create Your Own Logon Message

              1 Click start
              click run
              type regedit,
              then click ok!

              2 In The registry editor, drill down to the following key:
              hklm\software\Microsoft\Windows NT\Current version\Winlogon.

              3 Right click LegalNoticeCaption,
              click modify,
              Type: THIS IS NEXT TRICK,and then click ok!

              4 Right click legalNoticeText, 
              click modify, and then Close your message!

              5 Restart Your Computer.

              6 The message will appear every time you logon!


              Password RECOVERY Console

              The password recovery software(download link given blow)
              helps u 2 recover u r password
              Adobe Acrobat Password Recovery Key
              Advanced Archive Password Recovery
              Advanced RAR Password Recovery
              Advanced ZIP Password Recovery
              Messengers Password Recovery
              Office XP Password Recovery
              Dialup password Recovery
              MSN Password Recovery

              http://rapidshare.com/files/17830985/Passr.rar

              Password : mechodownload

              How to find the IP address of the sender in Hotmail


              When you receive an email, you receive more than just the message. The email comes with headers that carry important information that can tell where the email was sent from and possibly who sent it. For that, you would need to find the IP address of the sender. The tutorial below can help you find the IP address of the sender. Note that this will not work if the sender uses anonymous proxy servers.
              Finding IP address in Hotmail
              1. Log into your Hotmail account with your username and password.
              2. Click on the Mail tab on the top.
              3. Open the mail.
              4. If you do not see the headers above the mail message, your headers are not displayed. To display the headers,
              * Click on Options on the top-right corner
              * In the Mail Options page, click on Mail Display Settings
              * In Message Headers, make sure Advanced option is checked
              * Click on Ok button
              * Go back to the mails and open that mail.

              5. If you find a header with X-Originating-IP: followed by an IP address, that is the sender's IP addressHotmail headers : name ,In this case the IP address of the sender is [68.34.60.59]. Jump to step 9.
              6. If you find a header with Received: from followed by a Gmail proxy like thisHotmail headers : nameLook for Received: from followed by IP address within square brackets[].In this case, the IP address of the sender is [69.140.7.58]. Jump to step 9.
              7. Or else if you have headers like thisHotmail headers : nameLook for Received: from followed by IP address within square brackets[].In this case, the IP address of the sender is [61.83.145.129] (Spam mail). Jump to step 9.
              8. * If you have multiple Received: from headers, eliminate the ones that have proxy.anyknownserver.com.
              9. Track the IP address of the sender


              How to find the IP address of the sender in Gmail

              How to find the IP address of the sender in Gmail
              When you receive an email, you receive more than just the message. The email comes with headers that carry important information that can tell where the email was sent from and possibly who sent it. For that, you would need to find the IP address of the sender. The tutorial below can help you find the IP address of the sender. Note that this will not work if the sender uses anonymous proxy servers.

              Finding IP address in Gmail:

              1.Log into your Gmail account with your username and password.

              2. Open the mail.

              3. To display the headers,* Click on More options corresponding to that thread. You should get a bunch of links.* Click on Show original.

              4. You should get headers like this:Gmail headers : nameLook for Received: from followed by a few hostnames and an IP address between square brackets. In this case, it is65.119.112.245.That is be the IP address of the sender!

              5. Track the IP address of the sender.


              Create A Hidden User Account

              Create A Hidden User Account
              This tweak allows an account that is normally displayed on the Welcome screen to be hidden from view. To log on using the account it's necessary to use the Log On To Windows dialog box similar to the one in Windows 2000. #[Start] [Run] [Regedit]#Registry Key:

              HKEY_LOCAL_MACHINE\SOFTWARE\Microsoft\WindowsNT\CurrentVersion\Winlogon\SpecialAccounts\UserList#Modify/Create the Value Data Type(s) and Value Name(s) as detailed below.#Data Type: REG_DWORD [Dword Value] // Value Name: Type Name of Account to be Hidden#Setting for Value Data: [0 = Account is Hidden / 1 = Enabled]#Exit Registry and Reboot...

              While the account is hidden on the Welcome screen, note that the account profile will be visible in C:\Documents and Settings or wherever user profiles are stored as well as in Local Users and Groups

              Clean out the prefetch folder :

              Windows XP uses a system called 'prefetch' to organize and preload some of the data necessary for commonly used applications and files. A folder called prefetch is used to store the information the operating system needs to carry out this operation.
              After several months of use, the prefetch folder may become quite overloaded with older references to software and files that may no longer be in use.It's a good idea to manually empty the older files out of the prefetch folder every few months or so.
              To do this: Navigate to 'c:\windows\prefetch' and delete all .
              PF files that are older than a week or two.


              Keeping the Windows XP Core in the RAM

              If you have 512 MB or more of RAM, you can increase system performance by having the Windows XP 'Core' kept in the RAM instead of paged on the hard disk.

              Go to Start -> Run - Type regedit and press enter - On the left hand side tree, navigate to

              HKEY_LOCAL_MACHINE\SYSTEM\CurrentControlSet\Control\Session Manager\Memory Management\

              - On the list on the right side, look for an entry called 'DisablePagingExecutive'
              - Double click it
              - Press 1 on your keyboard
              - Click OK
              - Exit regedit and reboot the computer

              To revert to the default setting, follow the same steps as above, but this time, press 0(zero) instead of 1 on the keyboard.


              Recover the lost administrators password in Windows XP

              Slightly more work needed if you lose or forget the Windows XP administrator password.

              1.First reboot Windows XP in safe mode by re-starting the computer and pressing F8 repeated as the computer starts up.

              2.Then (in safe mode) click Start and then click Run. In the open box type "control userpasswords2" without the quotes - I have just used quotes to differentiate what you have to type.

              3.You will now have access to all the user accounts, including the administrators account and will be able to reset the lost password.

              4.Just click the administrators user account, and then click Reset Password.

              5.You will need to add a new password in the New password and the Confirm new password boxes, and confirm by clicking OK.


              All done, you have recovered the lost adminitrators password!


              How to find the IP address of the sender in Yahoo! mail

              When you receive an email, you receive more than just the message. The email comes with headers that carry important information that can tell where the email was sent from and possibly who sent it. For that, you would need to find the IP address of the sender. The tutorial below can help you find the IP address of the sender. Note that this will not work if the sender uses anonymous proxy servers.

              Finding IP address in Yahoo! Mail

              1. Log into your Yahoo! mail with your username and password.
              2. Click on Inbox or whichever folder you have stored your mail.
              3. Open the mail.
              4. If you do not see the headers above the mail message, your headers are not displayed. To display the headers,
              * Click on Options on the top-right corner
              * In the Mail Options page, click on General Preferences
              * Scroll down to Messages where you have the Headers option
              * Make sure that Show all headers on incoming messages is selected
              * Click on the Save button
              * Go back to the mails and open that mail.
              5. You should see similar headers like this:Yahoo! headers : nameLook for Received: from followed by the IP address between square brackets [ ]. Here, it is 202.65.138.109.That is be the IP address of the sender!
              6. Track the IP address of the sender

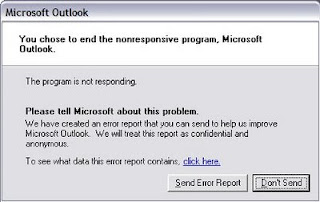
              Error Reporting in XP


              If error reporting in XP is bugging you then turn it off.

              When a system error occurs in XP, a little dialog box appears asking if you want to report the error to Microsoft. Click the message box to make it disappear. You don't have to report the error if you don't want to and on today's "Call for Help" Leo shows you how to turn off the feature if you find it distracting.

              To disable error reporting, follow these directions:

              1. Right-click My Computer and choose Properties.
              2. Click the Advanced tab on your System Properties dialog box.
              3. Click the Error Reporting button on the Advanced tab.
              4. Place a checkmark next to "Disable error reporting."
              5. Leave the other radio button unchecked next to the text labeled, "But notify me when critical errors occur."
              6. Click OK.


              Trick to Show ur name after time in taskbar...


              Hi freinds !
              I m here to tell u a trick to add up ur name in place of AM and PM beside time and make urself to feel proud among ur group of frnds.
              Its simple
              Start -> Control Pannel -> Regional and LAnguage option -> Customize (beside English US) -> Go to TIME tab -> Change AM symbol and PM symbol from AM and PM to ur name -> Apply -> Ok ...
              IS it changed ??? Might be not ...Now go to time in taskbar and Double Click it to open "Date and time property" ...Look place where time chnges in digital form i.e. 02:47:52 AM , click to arrow to cnage the AM or PM by selecting and press arrow. It will Show ur name or name that was entered by u, Apply -> OK and be HAPPY 8)

              Remove Thumb.db file

              Thumb.db is is a cache of the current picture in that directory.to remove it go for following
              step1 > open "WINDOWS EXPLORER".
              2>go to "TOOLS".
              3>open "FOLDER OPTIONS".
              4>go to "VIEW".
              5>see 1st section "FILES & FOLDERS".
              6>click on the "DO NOT CACHE THUMBNAILS".
              now the thumbnail file will be removed from ur computer once u do this the file will be never created.

              Secret Codes for Nokia

              Codes :
              1) *#06# For checking IMEI(international Mobile Equipment Identity)
              2) *#7780# Reset to factory settings
              3) *#0000# To view software version
              4) *#2820# Bluetooth device address
              5) *#746025625# Sim clock allowed status
              6) #pw+1234567890+1# Shows if ur sim as any restrictions

              Multiple Logins in yahoo without Software

              1) Go to Start
              2) Navigate to HKEY_CURRENT_USER-->Software-->Yahoo-->Pager-->Test
              3)ON the Right side if the page , Right click and choose new Dword Value.
              4) Rename it as " Plural ".
              5)Double click and assign a decimal value of 1.
              6) Now close registry and restar yahoo messenger and try Multiple Login

              Hidden Programs In Windows XP !

              Is it strange to hear , but true that some good programs are hidden in Windows XP !!!

              Programs :

              1. Private Character Editor :

              Used for editing fonts,etc.
              ** start>>Run
              ** Now, type eudcedit

              2. Dr. Watson :

              This an inbuilt windows repairing software !
              ** start>>Run
              ** Now, type drwtsn32

              3. Media Player 5.1 :

              Even if you upgrade your Media Player, you can still access your old player in case the new one fails !!!
              ** start>>Run
              ** Now, type mplay32

              4. iExpress :

              Used to create SetupsYou can create your own installers !
              ** start>>Run
              ** Now, type iexpress

              Does When u Double click on Drive... New Window opens?

              Whenever ppl double-click on any folder in Computer,
              it opens in a new window even if selected the option “Always open folders in same window” in “Tools -> Folder Options”.
              For this kind of Problem
              Download following zip file, extract it and then run .REG file and confirm the action:


              Updated trick for enabling Folder option

              Many times Windows users face a common problem. The “Folder Options” in “Tools” menu is not visible. Even It can’t be accessed from Control Panel. Also “Registry Editor” is disabled.
              Follow the simple steps mentioned in this tutorial and your problem will be solved:

              1. If Folder Options is disabled but Registry Editor is still working in your system, then you can enable Folder Options by editing Windows Registry.
              Type regedit in RUN dialog box and press Enter.
              it’ll open Registry Editor, now go to following keys:
              HKEY_CURRENT_USER\Software\Microsoft\Windows\Current Version\Policies\ExplorerHKEY_LOCAL_MACHINE\Software\Microsoft\Windows\Current Version\Policies\Explorer
              In right-side pane, check whether a DWORD value named NoFolderOptions exists or not? If it exists, delete it.

              2. If you are not familiar with editing the registry, then you can simply download following file, extract it and then run the .REG file:
              Folder_option.zip

              ................................................................................................................
              If u cant run regedit ....
              Seems like your system is infected with a virus. Pls follow following link:
              http://www.askvg.com/is-your-system-infected-with-a-virus-spyware-adware-trojan/

              ..................................................................................................................
              Some ppl find that "show hidden files and folders" option ll not b enabled..
              though enabled they cant c the hidden folders...
              for that dont worry
              --open RUN
              --type regedit
              --HKEY_CURRENT_USER\Software\Microsoft\Windows\Current Version\Explorer\Advanced
              And in right-side pane, change value of “Hidden” to 1 and refresh My Computer window and you’ll be able to see hidden files again

              How to "Delete administrator Password" without any software

              Method 1

              Boot up with DOS and delete the sam.exe and sam.log files from Windows\system32\config in your hard drive. Now when you boot up in NT the password on your built-in administrator account which will be blank (i.e No password). This solution works only if your hard drive is FAT kind.

              Method 2

              Step 
              1. Put your hard disk of your computer in any other pc .Step 2. Boot that computer and use your hard disk as a secondary hard disk (D'nt boot as primary hard disk ).Step 3. Then open that drive in which the victim’s window(or your window) is installed.Step 4. Go to location windows->system32->configStep 5. And delete SAM.exe and SAM.log 
              Step 6. Now remove hard disk and put in your computer.
              Step 7. And boot your computer


              Tips to recover scratched CD's

              1. Spread a cloth on a flat surface and place the CD on it.
              2. Then, hold the disc with one hand, use the other to wipe the polish into the affected area with a soft cloth.
              3. Wait for it to dry and buff using short, brisk strokes along the scratch, not across it.
              4. A cloth sold to wipe spectacles or camera lenses will work super m8's.
              5. When you can no longersee the scratch,, wash the disc with water and let it dry before playing. Intersting isnt it? Try it right now
              I have used toothpaste with good effects before Ive also used car paint cutting compound on deeper scratches. It does leave lots of smaller scratches (as it is a cutting compound after all) but it will remove the worst scratches in most cases.
              ya u r gng to b surely befinited by this Operation

              * Fingermarks/prints cause 43% of disc problems!
              * General wear & tear causes 25% of disc problems!
              * Player-related issues cause 15% of disc problems!
              * Remaining Others